
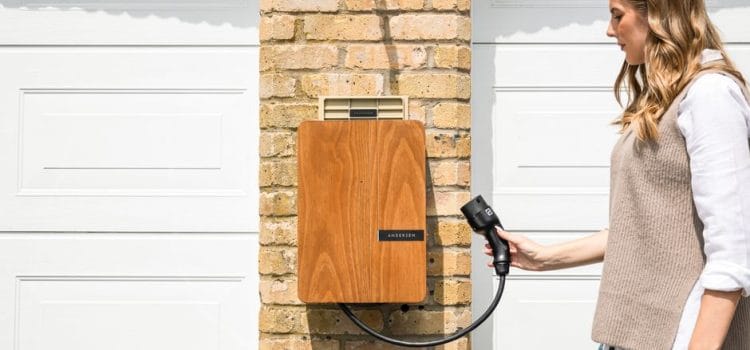
Why EV Charger Rodent-Proofing Is Suddenly a Big Deal
Home EV charging has moved from “nice-to-have” to everyday infrastructure. With that shift comes a less-discussed home-services problem: rodents chewing charger cables, nesting behind wall-mounted units, and entering garages through newly drilled penetrations. It’s a specific, growing issue because EV charger installs often add exactly what rodents look for—warmth, shelter, and new pathways into a structure.
Real-world example: many homeowners first notice trouble when a charger faults intermittently, a circuit trips, or the charging cable jacket shows tooth marks near the floor. Repairs can be expensive, and damaged insulation can be a safety hazard. The goal of this guide is to help you create a durable, code-aware “rodent-resistant charging zone” around your home charger without interfering with ventilation, drainage, or proper electrical practices.
Bonus context: rodents are widely recognized as a persistent urban and suburban issue, influenced by waste availability and the built environment. For broader reporting and data-driven context on rodents in cities and housing, you can browse coverage from The Guardian’s reporting on rodents and urban living.
What You’ll Need (Tools & Materials)
- Personal safety: work gloves, safety glasses, dust mask
- Inspection: bright flashlight/headlamp, mirror on a stick (optional)
- Sealing: stainless steel or copper mesh (rodent-proof), exterior-grade sealant, expanding foam labeled “pest-block” (use carefully), backer rod
- Barrier materials: metal conduit (EMT) or rigid metal conduit for exposed runs, conduit straps/clamps, metal junction box covers where needed
- Fasteners: exterior-rated screws/anchors appropriate for masonry or studs
- Garage door gap control: rodent-rated door sweep, threshold seal
- Clean-up: disinfectant cleaner, paper towels, sealable bags
Note: If you are not comfortable working around electrical equipment, limit yourself to inspection and non-electrical sealing steps. When in doubt, use a licensed electrician—especially if you suspect damage to wiring or conduit.
Step-by-Step: Rodent-Proofing Your Home EV Charging Area
1) Map Your “Rodent Routes” Before You Seal Anything
Rodents typically travel along edges and concealed lines: baseboards, the garage perimeter, pipes entering walls, and the corner behind appliances or shelves. Start by identifying where your EV charging setup intersects those routes.
- Look for droppings (mouse droppings are often 3–6 mm, rice-shaped; rat droppings are larger).
- Check for rub marks (dark smudges along walls), gnawing, shredded material, or nesting.
- Inspect cable paths: the first 2–3 feet above the floor is a common chew zone.
Actionable tip: Sprinkle a light dusting of flour along suspected travel lines overnight. In the morning, you may see tracks that show where to focus sealing and protection.
2) Identify the “New Hole” Created by the Charger Install
Many EV chargers require a new wall penetration for wiring, conduit, or communications cable. Even a cleanly drilled hole can leave a small gap around conduit or sleeve—big enough for a mouse (often able to squeeze through openings around the size of a dime).
- Inside the garage: check behind/under the charging unit and where conduit enters the wall.
- Outside the home: locate the corresponding penetration and check for cracks, unsealed edges, or deteriorated caulk.
Real-world example: A common install has conduit entering the garage wall near the floor, then running up to a wall-mounted charger. If the exterior side of that conduit entry isn’t sealed tightly with durable material, rodents can follow it like a marked trail.
3) Clean and Prep: Sealing Fails When Surfaces Are Dirty
Before sealing, remove cobwebs, loose debris, and dust. Sealants and mesh adhere poorly to dirty or damp surfaces.
- Wear gloves and a mask.
- Use disinfectant on droppings before wiping (avoid sweeping dry droppings into the air).
- Allow surfaces to dry fully before applying sealant.
4) Seal Entry Points Using Mesh + Sealant (Not Foam Alone)
Expanding foam by itself is not a rodent barrier; it can be chewed. The reliable approach is mesh (metal) + sealant.
- Fill the void with stainless steel or copper mesh tightly packed into the gap.
- Cap it with an exterior-grade sealant to lock the mesh in place and prevent moisture intrusion.
- Use backer rod for larger gaps to reduce sealant use and improve the joint.
Actionable tip: For irregular masonry gaps around conduit, press mesh into crevices with a flat tool, then apply sealant in a continuous bead with no pinholes.
5) Upgrade Exposed Cable Runs to Rodent-Resistant Pathways
If any portion of your charging cable, whip, or feeder wiring is exposed at rodent height, add protection. The best defense is to limit accessible, chewable materials.
- Use metal conduit (EMT or rigid, depending on location and code) for exposed runs.
- Secure conduit with appropriate straps at recommended intervals so it doesn’t flex.
- Avoid “dangling loops” of cable near the floor—coil management should keep the main cable elevated and tight.
Important: Don’t modify internal charger wiring unless you’re qualified. The goal here is to protect accessible exterior paths and reduce chew opportunities.
6) Rodent-Proof the Charger Cable Storage Habit (Yes, It Matters)
Daily habits can make your setup more or less attractive to rodents. A cable lying on the floor can become both a chew target and a nesting “edge.”
- Install a wall-mounted cable hook high enough that the cable doesn’t touch the floor.
- Keep the connector parked in its holster; avoid leaving it on the ground.
- If your garage is dusty, periodically wipe the cable—grime can mask early chew marks.
Real-world example: Homeowners who keep cables off the ground often spot issues earlier because the cable is visible and not tucked behind storage bins where damage can go unnoticed.
7) Close the Big Gap Everyone Misses: The Garage Door Line
Even a perfectly sealed wall penetration won’t help if rodents walk under the garage door. Check for daylight at the corners and along the bottom edge.
- Replace worn bottom seals with a rodent-rated door sweep.
- Add a garage threshold seal if the slab is uneven.
- Ensure side seals are intact and the door fully seats when closed.
Actionable tip: A quick test is to close the door, turn off the garage lights, and look for daylight from inside. Light leaks often match entry points.
8) Control Attractants: EV Areas Often Become “Snack Zones”
Rodent-proofing is not only about blocking holes. If food sources exist, pressure increases and rodents work harder to get in.
- Store pet food, bird seed, and grass seed in sealed metal containers.
- Keep recycling rinsed; sticky residue can attract pests.
- Reduce clutter around the charger—cardboard and fabric are prime nesting material.
Data point to apply: In pest management, “harborage + food + water” is the triangle that sustains infestations. Garages often provide all three unless intentionally managed.
9) Add a Monitoring Plan (So You Don’t Find Out via Charger Failure)
Once you’ve sealed and protected, monitor for activity—especially seasonally (fall and winter are common times for rodents to seek shelter).
- Do a monthly visual inspection of the first 3 feet of cable and the wall behind the charger.
- Place non-toxic monitoring blocks or tracking patches in discreet corners (follow label instructions).
- Consider smart garage sensors to ensure doors aren’t left open overnight.
Actionable tip: If your charger has an app, pay attention to new patterns—frequent disconnects or faults can be a reason to inspect the physical setup.
10) Know When to Call a Pro (And What to Ask)
Call a rodent-proofing specialist or electrician if you see any of the following:
- Visible copper, melted insulation, scorch marks, or frequent breaker trips
- Repeated gnawing despite sealing (indicates an active entry route you missed)
- Nesting behind the charger or inside wall cavities
Questions to ask:
- “Can you identify all likely entry points and provide a sealed-exclusion plan?”
- “What materials do you use—mesh, metal flashing, mortar—rather than foam only?”
- “Can you coordinate with my electrician so sealing doesn’t conflict with code or ventilation needs?”
Common Mistakes to Avoid
- Relying on peppermint oil or ultrasonic devices as a primary solution (these are unreliable as stand-alone defenses).
- Sealing without inspecting (you can trap rodents inside, creating odor and contamination issues).
- Using foam alone on exterior penetrations (it degrades and is chewable).
- Leaving the cable on the ground or behind clutter where damage can progress unnoticed.
Conclusion: Build a Rodent-Resistant “Charging Zone” Once, Then Maintain It
Rodent-proofing an EV charging setup is a modern home-services task that combines exclusion, durable materials, and smarter daily habits. Focus on the installation’s weak points—new penetrations, low cable access, and garage door gaps—then reduce attractants and monitor monthly. Done well, you’ll protect your charger investment, reduce safety risks, and avoid the frustrating scenario of discovering damage only after charging fails.
If you want the most reliable outcome, treat this like a small home-improvement project: document the entry points you sealed, note the materials used, and schedule seasonal checkups. A few hours of proactive work can prevent weeks of nuisance and costly repairs.