
11 Overlooked Rodent-Proofing Checks Most Homeowners Miss (But Rats Don’t)
Rodent proofing isn’t just about traps and bait. In real homes, rats and mice usually get inside because of small, repeatable oversights: a dryer vent flap that doesn’t close, a garage door that bows in the middle, a cluttered storage corner that becomes a “safe corridor.” The good news is that many of these issues are cheap to fix once you know where to look.
Below is a practical, field-tested checklist of often-missed entry points and “rodent-friendly” conditions—especially relevant for older houses, busy households, and anyone living near construction, parks, rail lines, or restaurant corridors (all common rodent travel routes).
One important context: urban rodent activity is influenced by trash access, building condition, and weather. Reporting and research cited by The Guardian’s coverage of urban rat trends highlights how quickly rodent pressure can shift when food waste, infrastructure, and climate patterns change—meaning prevention needs to be continuous, not a one-time project.
1) The “Quarter-Inch Rule” Audit (With a Flashlight and a Pencil)
Many homeowners know rodents can squeeze through small gaps, but they underestimate how small. Mice can fit through holes around 6–7 mm (about the diameter of a pencil), and rats can exploit larger openings. The most useful habit is a quick perimeter audit using simple “gauges” you already own.
- Actionable check: Walk the exterior at dusk with a bright flashlight held low to the ground. Look for light shining through gaps, cracks, and utility penetrations.
- Quick gauge: If a pencil can slide into a gap, treat it as mouse-accessible. If two fingers can fit, it’s likely rat-accessible.
- Fix: For small gaps, use stainless steel wool plus sealant. For larger voids, use rodent-rated metal mesh or hardware cloth, then seal edges.
Real-world example: In many split-level homes, the sill plate area behind shrubs develops hairline cracks that go unnoticed until winter when rodents seek warmth. A 30-minute flashlight audit often reveals multiple “micro-entries.”
2) Dryer Vent Flaps: The Quiet Welcome Sign
Dryer vents are a classic entry, but the “overlooked” part is that many vents technically have flaps—yet those flaps stick open due to lint buildup, warping, or poor installation angle.
- Actionable check: While the dryer is off, confirm the exterior flap closes fully and stays closed in wind.
- Fix: Install a rodent-resistant vent cover designed to close tightly (without a screen that traps lint). Clean lint quarterly to prevent propping the flap open.
- Extra tip: If you hear “ticking” or scratching near the vent at night, don’t run the dryer as a deterrent—address the entry point first.
3) AC Line Set and Condensate Line Penetrations (The “Perfect Tunnel”)
The hole where your air conditioner lines enter the house is often oversized and filled with degrading foam. That foam can shrink, crack, or be chewed, leaving a hidden pathway directly into wall cavities.
- Actionable check: Look where refrigerant lines and the condensate drain enter the structure. Push gently on foam—if it crumbles, it’s not a barrier.
- Fix: Replace with a combination approach: metal mesh (for chew resistance) plus high-quality exterior sealant.
- Bonus prevention: Ensure the condensate line drains properly. Standing water nearby can increase pest activity.
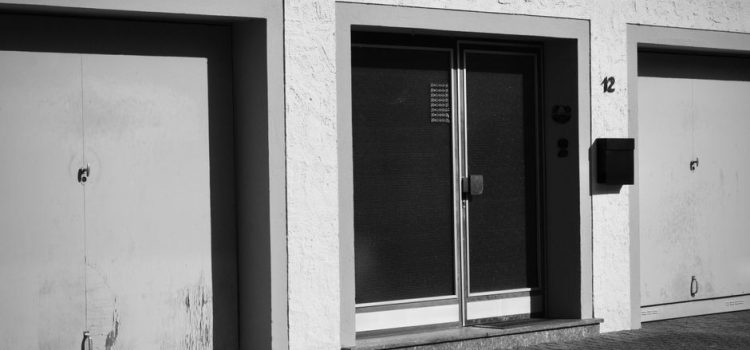
4) Garage Door “Smile”: The Center Gap Most People Never Notice
Garage door seals wear unevenly. Even if the corners look tight, the middle can bow upward, creating a subtle gap that rodents use as a nightly commute.
- Actionable check: At night, close the garage and turn off interior lights. If you see daylight under the center, you’ve likely got an entry.
- Fix: Replace the bottom seal with a high-quality rubber gasket and consider adding a threshold seal on the concrete for a tighter interface.
- Operational tip: Avoid storing pet food, bird seed, or grass seed in the garage unless it’s in a sealed metal container.
Data point: In many pest inspections, garages are the most common “first stop” before rodents move into wall voids and attics—because garages combine easy gaps with stored food and clutter.
5) Deck Ledger Boards and Attached Porches (Hidden Runways)
When a deck attaches to a home, it creates a sheltered zone that hides gaps, rot, and holes in the rim joist area. Rodents love covered travel lanes that keep them safe from predators.
- Actionable check: Inspect where the deck meets the house. Look for rot, soft wood, and gaps in flashing.
- Fix: Repair rot, install proper flashing, and close gaps with rodent-rated metal mesh. Avoid expanding foam as the only barrier.
- Landscape tip: Keep vegetation trimmed back so you can see the connection point and reduce concealment.
6) Roofline “Edge Cases”: Fascia Corners, Kick-Out Flashing, and Gutter Backflow
Rodent proofing often focuses on foundations, but roofline details can be just as important—especially in homes with trees near the roof or older fascia boards.
- Actionable check: Look for gaps at fascia corners, lifted drip edge, or spots where gutters overflow and rot the wood.
- Fix: Repair damaged fascia, add proper kick-out flashing near roof-to-wall transitions, and keep gutters clean so water doesn’t create rot “soft spots.”
- Behavioral insight: Rats can climb textured surfaces and travel along utility lines. If a branch overhangs your roof, treat it like a bridge.
7) Crawl Space Vents and “Temporary” Covers That Become Permanent
Crawl space vents are meant to ventilate, but older vent grates can rust out or pop loose. Sometimes homeowners stuff vents with plastic, cardboard, or loose mesh “temporarily,” which rodents can shred quickly.
- Actionable check: Tug gently on each vent cover. If it flexes or pulls away, it’s not secure.
- Fix: Install properly fastened, corrosion-resistant vent grates or hardware cloth secured with screws and washers.
- Moisture note: Address crawl space moisture (vapor barrier, drainage). Dampness attracts insects, which can indirectly attract rodents.
8) The “Warm Corner” Problem: Appliances that Create Hidden Nest Zones
Rodents often nest behind refrigerators, stoves, and water heaters because they provide warmth, shelter, and crumbs. Proofing isn’t just sealing holes—it’s also removing the conditions that make nesting appealing.
- Actionable check: Pull the fridge and stove out twice a year. Vacuum debris and inspect for droppings, shredded material, or grease trails along baseboards.
- Fix: If you find activity, trace it to the nearest wall penetration (plumbing, gas line, electrical) and seal with metal mesh plus sealant.
- Safety note: For gas appliances, use appropriate materials and consider professional help to avoid interfering with ventilation or connections.
9) Pet Doors, Worn Weatherstripping, and “Training Gaps”
Pet doors are convenient, but even when a pet door is too small for a rat to use directly, gaps around the frame, warped flaps, and worn weatherstripping nearby can create access points.
- Actionable check: Inspect the pet door frame for cracks and gaps. Check nearby door sweeps and jamb seals.
- Fix: Upgrade to a model with a tighter seal and consider locking it at night. Replace door sweeps annually if you see daylight.
- Practical habit: Feed pets on a schedule and pick up bowls after meals—overnight bowls are a high-value food source.
10) “Compost Without Consequences”: How to Compost Without Feeding Rodents
Composting is increasingly popular, but an open or poorly managed compost setup can become a rodent buffet. The goal is not to stop composting—it’s to compost smarter.
- Actionable check: If you compost, confirm your bin has a secure lid and no ground-level gaps.
- Fix: Use a rodent-resistant compost bin or add 1/4-inch hardware cloth underneath and around intake points. Keep the bin at least several feet from the house.
- What not to add: Avoid meat, oily foods, and large volumes of bread/rice unless you have a sealed system designed for it.
- Operational tip: Bury fresh food scraps under “brown” material (dry leaves/cardboard) to reduce odor and access.
Real-world example: Neighborhoods that normalize backyard composting sometimes see localized rodent pressure rise if even a few bins are unsecured. A sealed bin and good “browns-to-greens” balance significantly lowers risk.
11) Trash Can Micro-Upgrades That Make a Big Difference
Trash is the #1 consistent food source around many homes. You don’t need industrial dumpsters to make progress—small changes in containers and routines reduce attractants dramatically.
- Actionable check: Test your outdoor trash can lid: if you can lift it with two fingers easily, a raccoon can too—and rodents benefit from the spills.
- Fix: Choose a can with a locking lid or add a bungee system. Rinse sticky containers (meat trays, yogurt cups) before tossing.
- Timing tip: Put bins out on the morning of pickup rather than the night before where possible. That removes hours of easy access.
- Cleanup tip: Once a month, hose out the trash can and sprinkle baking soda to reduce odors that cue foraging.
Conclusion: Build a Routine, Not a One-Time “Rodent Fix”
Effective rodent proofing is a system: close the small gaps, reduce the food and shelter cues, and re-check the places that degrade over time (vents, seals, flashing, and weatherstripping). If you implement even half of the checks above, you’ll reduce the odds of surprise infestations—especially during seasonal shifts when rodents actively seek warmth and stable food sources.
For best results, set a simple schedule: do an exterior gap audit in spring and fall, clean vents and gutters quarterly, and do a quick “warm corner” appliance pull twice a year. The goal is to make your home consistently inconvenient for rodents—so they move on.