
What is “smart” rodent proofing, and why is it trending in property maintenance?
“Smart” rodent proofing blends traditional exclusion (blocking entry points) with modern monitoring and maintenance routines—think moisture control, sensor alerts, and data-driven inspections. It’s trending because property owners want fewer surprise infestations, reduced repair costs, and a more proactive approach than simply setting traps after noises start.
Rodents can enter through gaps as small as 6–12 mm (about the size of a pencil or small coin edge, depending on species). The smart angle is not just sealing gaps, but also identifying the conditions that invite rodents: warmth, food access, cluttered storage, and hidden water sources. A smart plan prioritizes the highest-risk points and verifies results with monitoring rather than guesswork.
Why are rodents a property maintenance problem, not just a pest-control issue?
Rodents are directly tied to building performance. Their activity can trigger costly maintenance problems that persist even after the rodents are removed:
- Electrical damage: Chewed insulation increases fire risk and causes intermittent faults that are difficult to diagnose.
- Plumbing and HVAC impacts: Nesting near boilers, ducting, or insulation can reduce efficiency and create odours.
- Moisture and mould: Rodents often exploit damp voids; their presence can signal leaks or condensation issues.
- Structural deterioration: Gnawing, burrowing, and soiling can degrade timber, plaster, and stored materials.
In other words, robust rodent proofing is preventative maintenance. When done well, it reduces callouts, improves tenant satisfaction, and protects asset value.
Which parts of a building benefit most from “sensor-assisted” rodent monitoring?
Sensors and monitoring tools are most useful in areas that are hard to inspect frequently or where early detection prevents major repairs:
- Lofts/attics: Motion/temperature changes and gnawing often go unnoticed until insulation is damaged.
- Basements and crawl spaces: High humidity, hidden pipework, and limited access make these prime risk zones.
- Plant rooms and service risers: Warmth and penetrations for cables/pipes create frequent entry opportunities.
- Commercial bin stores: Persistent food odours and foot traffic can mask early signs.
Practical monitoring options include battery-powered motion sensors, door contact sensors on external storage areas, and scheduled “proofing audits” supported by a simple checklist. Some property managers also use smart leak detectors; reducing persistent dampness is one of the most effective long-term deterrents.
What’s the best way to do a “data-driven” inspection without expensive equipment?
You can create a surprisingly effective system with a smartphone, a notepad (or spreadsheet), and consistent inspection categories. Here’s a low-cost approach used by many facilities teams:
- Map the building: Divide it into zones (e.g., front elevation, rear elevation, roofline, basement, kitchens, bin areas).
- Score each zone monthly: Rate “entry points,” “food access,” “water/moisture,” and “clutter/harbourage” from 0–3.
- Photograph vulnerabilities: Take before-and-after photos of gaps, damaged air bricks, broken seals, or cracked vents.
- Log recurring hotspots: If the same gap reopens, it’s telling you something about movement, poor materials, or installation methods.
Real-world example: a small block of flats repeatedly saw droppings in a ground-floor cupboard. A photo log showed the issue returned after heavy rain—leading to discovery of a damaged air-brick and damp subfloor conditions. Fixing the air-brick with a rodent-resistant mesh insert and addressing drainage resolved both moisture and rodent activity.
Which modern building materials unintentionally create rodent entry opportunities?
Some newer materials and retrofit choices can inadvertently make entry easier if details are missed:
- Composite cladding and soffits: Poorly finished edges can leave concealed voids along the roofline.
- Spray foam and soft fillers: Rodents can chew through many foams; they’re not a substitute for rodent-proof barriers.
- Plastic air vents and ducting: Thin plastics can be gnawed; consider metal-backed or rodent-rated components.
- Cable and pipe penetrations after upgrades: New EV chargers, fibre lines, and heat pump services can introduce fresh gaps if not sealed correctly.
A good rule: if a material can be cut with a utility knife, assume it can be compromised by gnawing unless protected with metal mesh, cementitious repair, or purpose-made rodent-proof collars.
How do I seal gaps properly without causing ventilation or moisture problems?
One common DIY mistake is sealing everything airtight without understanding airflow needs. Good rodent proofing blocks entry while preserving required ventilation:
- Use rodent-resistant mesh on vents: Fit stainless steel or galvanised mesh sized to maintain airflow while preventing entry. Avoid blocking air bricks entirely—use inserts designed for ventilation.
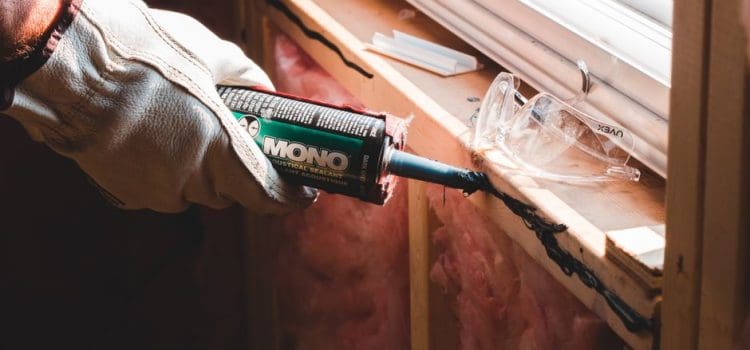
- Choose the right seal for the gap: For small gaps around pipes, use rodent-proof collars or a combination of wire wool (stainless) and exterior-grade sealant—never foam alone.
- Repair, don’t “cover” rot: If timber is soft, repair the underlying issue (often moisture) before sealing.
- Maintain drainage and ground levels: Soil or mulch piled against walls can bridge the damp-proof course and create hidden routes into cavities.
Actionable tip: do a “night gap test.” After dark, have one person stand inside with lights off while another shines a bright torch along the exterior junctions (pipes, sills, door thresholds). Any visible light from outside indicates a potential entry point worth addressing.
What are the highest-impact maintenance tasks to reduce rodent attraction year-round?
If you only do a few things, focus on these because they remove the conditions rodents rely on:
- Waste control: Ensure bin lids close fully, clean bin stores regularly, and keep bags off the ground. Even “sealed” bin areas can leak odour; regular wash-down reduces attractants.
- Moisture management: Fix dripping overflows, leaking outdoor taps, and slow plumbing leaks under sinks. Damp voids are high-value habitat.
- Vegetation and storage: Trim dense ground cover near walls and keep stored items on shelving with visible clearance.
- Door and threshold upkeep: Replace worn brush strips and fit metal kick plates where gnawing is likely.
Data point to guide budgeting: routine exclusion and proofing is often far cheaper than repairs to wiring, insulation replacement, or repeated reactive pest visits—especially in multi-unit properties where one weak point can affect multiple flats.
Can smart doorbells, cameras, or thermal tools help identify rodent routes?
They can help indirectly. While you won’t usually “see” rodents clearly on standard doorbells, cameras can reveal patterns that correlate with rodent activity:
- Night-time movement near bin stores: Regular motion triggers can indicate activity, especially if paired with droppings sightings.
- Entry timing: Repeated motion at the same hour may point to predictable foraging routes.
- Thermal imaging (even basic): Can highlight missing insulation, warm voids, and potential harbourage zones around boilers or behind kitchen units.
Use these observations to target proofing and sanitation, not to replace physical inspection. The goal is to confirm where to spend time and money.
How should landlords and property managers handle rodent proofing in multi-unit buildings?
Multi-unit buildings need a coordinated plan because rodents move through shared voids, service penetrations, and communal waste areas. Best practice includes:
- Centralised reporting: A simple form or email alias for tenants to report sightings, gnawing, or odours. The speed of reporting often determines the scale of damage.
- Standardised repairs: Use consistent materials (metal mesh, appropriate sealants, rodent-proof vents) so fixes don’t fail in different flats.
- Communal area priority: Bin stores, risers, basements, and shared kitchens/laundries should be inspected on a set schedule.
- Tenant guidance: Clear rules on waste storage, feeding birds near entrances, and avoiding food storage in vulnerable areas.
Real-world example: a property manager reduced recurring callouts by introducing quarterly “service penetrations checks” after broadband upgrades. Installers had drilled new routes, leaving gaps behind skirting and in cupboards. Standardised grommets and collars reduced re-entry significantly.
What health and safety considerations should be included in a rodent-proofing maintenance plan?
Rodent activity is linked to contamination risks and can affect building hygiene. Maintenance teams should treat droppings, nesting materials, and contaminated insulation as a safety issue:
- PPE and cleaning protocols: Avoid dry sweeping; use appropriate disinfectants and sealed disposal methods.
- Electrical safety: If gnawing near cables is suspected, isolate circuits where appropriate and have a qualified electrician inspect before re-energising.
- Documentation: Keep a record of sightings, proofing works, and follow-up inspections. This supports compliance and helps identify trends.
For broader context on rodents and the risks they can pose, resources from established news and science desks can be useful background reading; for example, BBC News coverage on rats and urban pest issues often summarises expert commentary and public health angles in an accessible way.
How do I know if proofing worked, and what’s a realistic follow-up schedule?
Proofing “worked” when you see a sustained reduction in signs of activity and no new entry evidence. Use measurable indicators:
- No new droppings or smear marks in known hotspots over 2–4 weeks.
- No fresh gnawing on door edges, stored items, or service penetrations.
- Stabilised monitoring results (fewer motion triggers in high-risk zones, fewer tenant reports).
A practical follow-up schedule:
- 48–72 hours after repairs: Quick visual check of repaired gaps and seals.
- 2 weeks: Re-inspect hotspots and confirm no new signs.
- Seasonal (quarterly): Full perimeter walk, bin area inspection, and loft/basement spot checks.
Rodent pressure often increases in colder months as animals seek warmth, so autumn is an ideal time for a thorough proofing audit.
Conclusion: What’s the simplest “smart” rodent-proofing plan a property owner can start this month?
A smart plan doesn’t require a complex tech stack. Start with a disciplined routine that combines exclusion, moisture control, and verification:
- Week 1: Do a perimeter inspection and photograph every gap, damaged vent, or suspect penetration.
- Week 2: Prioritise top 5 vulnerabilities (bin store, doors, air bricks, service entries, roofline) and repair with rodent-resistant materials.
- Week 3: Address moisture and waste control (fix leaks, clean bin areas, improve storage practices).
- Week 4: Re-check and document results; set a quarterly reminder for repeat inspections.
By treating rodent proofing as an ongoing property maintenance system—supported by simple monitoring and consistent follow-ups—you’ll reduce surprise infestations, protect building fabric, and keep small vulnerabilities from becoming expensive repairs.