
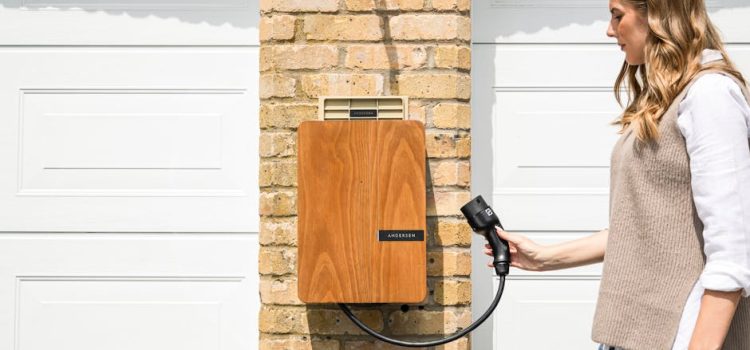
Why EV chargers and garages are becoming a rodent hotspot
Electric-vehicle ownership is rising, and with it, a very specific pest-control problem: rodents chewing charging cables, nesting near warm electronics, and slipping through garage gaps that homeowners overlook for years. Unlike a typical “mice in the pantry” situation, EV charging setups add new attractants—warmth, shelter, and cable insulation that’s easy to gnaw.
In practical terms, rodent damage can mean: interrupted charging, error codes, blown fuses, damage to charging connectors, or even a non-functioning charger until parts are replaced. The good news is that you can drastically reduce the risk with a focused, step-by-step rodent-proofing plan that targets entry points, nesting zones, and chew hazards around your garage and charger.
Weather and seasonality also matter. In many regions, rodent pressure spikes in fall and winter as animals seek warmth and shelter. If you charge in a garage or on an exterior wall, you’re effectively offering a protected micro-environment next to a reliable power source.
For broader context on how urban rats thrive around human infrastructure and why the issue is getting attention, you can review ongoing reporting and resources at The New York Times coverage on rats in cities.
Step-by-step: Rodent-proof your EV charging area (and the garage around it)
1) Map your “rodent risk zone” around the charger
Start by marking a 10–15 foot radius around your EV charger (or the outlet where you plug in). Rodents rarely damage something randomly; they travel along edges, behind storage, and near clutter. You’re looking for three things:
- Travel lanes: Along walls, behind shelves, under cabinets, and around stacked boxes.
- Harborage: Soft materials (cardboard, old towels), stored pet food, bird seed, grass seed, or insulation.
- Entry points: Any gap to outdoors, attic, crawlspace, or wall voids.
Real-world example: A common scenario is a wall-mounted charger near a side door with a worn door sweep. Mice use that door gap to enter nightly, then run the baseboard line directly to the charger because it’s mounted on the wall with a warm transformer behind it.
2) Identify droppings and rub marks to confirm activity
Before sealing anything, confirm where rodents are active so you don’t waste time on low-risk areas. Check:
- Droppings: Mouse droppings are typically small (about rice-sized). Rat droppings are larger and blunt-ended.
- Rub marks: Greasy smudges along baseboards or around holes indicate frequent travel.
- Gnawing: Fresh chew marks appear lighter in color than older gnawing.
Actionable tip: Lightly dust suspected travel edges with flour overnight. The next morning, look for tracks that show where rodents are moving—especially near the charger cable path.
3) Remove attractants that pull rodents into the garage
Rodent-proofing works best when you reduce food and nesting resources. In garages, the biggest culprits are often not “food” in the kitchen sense:
- Bird seed, grass seed, and bulbs: Store in thick, lidded plastic or metal bins.
- Pet food: Even “just overnight” can feed a mouse population.
- Cardboard: It’s both nesting material and a hiding place. Move items into sealed totes.
- Standing water: Fix minor leaks; rodents need water access.
Data point (practical rule of thumb): Mice can reproduce rapidly, and small food sources can sustain them. If you routinely store seed or pet food in a garage, you’re effectively maintaining a food station near your wiring and cables.
4) Seal garage door vulnerabilities (the #1 entry route)
Most garages leak like sieves. Focus on the garage door first:
- Replace the bottom seal: If you can see daylight, rodents can often squeeze under.
- Install side/top weatherstripping: Close the “vertical track gaps” where the door meets the frame.
- Check corners: The bottom corners are a classic entry point.
Actionable measurement tip: If a gap is around the thickness of a pencil (roughly 1/4 inch), a mouse may fit. Treat any visible gap as a sealing priority.
5) Seal penetrations near the charger: conduits, holes, and wall voids
EV installations often require drilling through walls for wiring. Those penetrations can become a direct highway into wall cavities. Inspect the wall behind and around your charger for:
- Unsealed conduit entries
- Gaps around junction boxes
- Cracks in drywall or foundation transitions
Best-practice materials: Use steel wool plus rodent-rated sealant for small gaps, and metal flashing or hardware cloth for larger openings. Avoid foam alone in high-risk spots—rodents can chew through it.
Real-world example: Homeowners sometimes notice “mystery” charger faults only to discover a mouse nest in the wall cavity where the cable enters, with chewed insulation near the entry point.
6) Protect the charging cable from chewing (without creating a trip hazard)
The cable is the most obvious chew target. You want physical protection and better cable management:
- Use a cable management hook or holster: Keep cables off the ground when not in use.
- Install a rigid protective sleeve: Where the cable is exposed low to the ground, add a protective conduit or split loom rated for abrasion and outdoor use.
- Avoid leaving slack coils on the floor: Coils become a sheltered “nesting ring” behind boxes or tires.
Actionable tip: Route the cable along a wall at least a few feet above the floor before it drops to the connector. Rodents prefer low, hidden edges; elevated runs reduce casual contact.
7) Rodent-proof the garage’s “hidden warmth zones”
Rodents love warm, quiet spots. In a garage, that often includes:
- Behind refrigerators/freezers
- Near water heaters or boilers (attached garages)
- Behind stored furniture or wall-mounted cabinets
- Near charger power electronics (especially if enclosed)
Pull appliances away from walls and vacuum debris. If you find nesting material, remove it with gloves and appropriate precautions, then seal access routes.
Actionable tip: Reduce clutter within the 10–15 foot “risk zone” around the charger so rodents have fewer sheltered approaches.
8) Add targeted monitoring before you add heavy trapping
Monitoring tells you whether your sealing and sanitation steps are working. A simple, professional approach:
- Place non-toxic monitoring blocks (or tracking cards) along walls and behind objects in the risk zone.
- Check weekly for 2–4 weeks after sealing, then monthly.
Why it matters: If activity persists, it usually means there’s still an entry point you missed—not that you need “stronger poison.” Monitoring helps you find the remaining pathway.
9) If activity persists, deploy traps strategically (and safely)
For many homeowners, snap traps in protected boxes (or along walls where pets and kids can’t access) are the fastest way to reduce an existing population. Key guidelines:
- Placement: Put traps perpendicular to walls with the trigger end near the wall—rodents travel tight to edges.
- Quantity: One trap rarely solves an active problem. Use multiple traps in the risk zone.
- Bait: A pea-sized amount of peanut butter or chocolate spread is effective and reduces “bait theft.”
- Safety: Keep traps away from the charger cable path and where someone might step while connecting the vehicle.
Professional note: Avoid relying on rodenticides in garages if you’re not trained—secondary poisoning risks and odor issues from rodents dying in wall voids can create bigger problems than the original infestation.
10) Add a maintenance schedule so the fix stays fixed
Rodent-proofing isn’t a one-time task—especially around garages where weatherstripping wears and new gaps appear. Use this simple schedule:
- Monthly: Inspect door seals, check for droppings, confirm cable storage is off the floor.
- Quarterly: Re-check wall penetrations and conduit seals, declutter the risk zone.
- Seasonally (fall): Do a full perimeter inspection and replace worn sweeps/weatherstripping.
Actionable tip: Take a “baseline” photo of your sealed penetrations and garage door corners. Later, you can compare and immediately see if something shifted or deteriorated.
Troubleshooting: What to do if the charger still shows issues
If you’ve had rodent activity near the charger, treat any error codes or intermittent charging as a potential safety concern:
- Stop using damaged equipment: If you see chew marks or exposed wire, discontinue charging and contact a qualified electrician or the charger manufacturer.
- Inspect the full cable length: Look for flattened spots, tooth marks, or abnormal bends.
- Check the wall area around the charger: New droppings or scratching sounds may indicate a nest in the wall cavity.
Real-world example: A homeowner may only notice the issue when cold weather arrives and rodents move in. The charger works fine in summer, then fails sporadically in fall due to newly chewed insulation or moisture exposure from compromised sheathing.
Conclusion: Make your EV charging setup a “no-rodent zone”
Rodent-proofing an EV charger area is about precision: eliminate attractants, seal entry points, protect cables, and verify results with monitoring. The most effective plans start with the garage door and wall penetrations, then tighten up cable management and reduce clutter within a defined radius of the charger. Follow the steps above and you’ll dramatically lower the chance of chewed cables, surprise charging failures, and repeated infestations—while keeping your garage cleaner and easier to maintain year-round.