
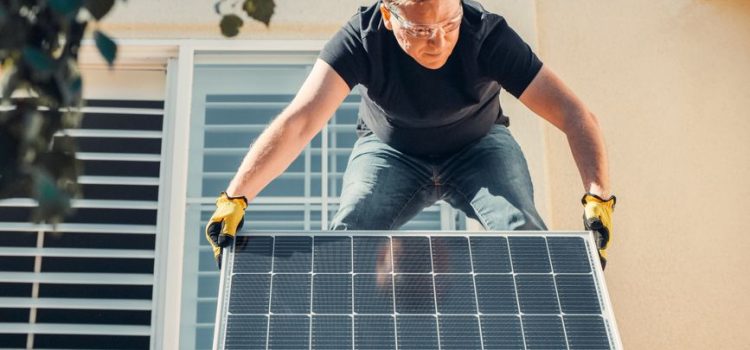
Why solar + rooflines have become a rodent hot spot
Home solar is booming, and with it comes a less-discussed home services issue: rodents nesting under panels and entering attics through roofline gaps. The space beneath solar panels is warm, sheltered, and often close to utility runs—exactly what mice and rats like. Even worse, rodents are prolific chewers. Many homeowners discover the problem only after a power drop, a tripped breaker, or an expensive service call.
This guide focuses on a specific, increasingly common scenario: rodents targeting wiring and access points around rooftop solar systems. You’ll get a step-by-step plan to inspect, seal, and harden your roofline and attic—without damaging your solar equipment or voiding warranties. If you rent or your system is leased, check your contract before modifying anything and coordinate with your installer.
What you’ll need (tools & materials)
- Headlamp and a bright flashlight
- N95 mask and gloves (rodent droppings can carry pathogens)
- Binoculars (for ground-level panel-edge inspection)
- Stainless steel mesh (1/4-inch hardware cloth) and/or solar panel critter guard kit (PVC-coated steel mesh designed for panels)
- Exterior-rated fasteners (panel-appropriate clips if using a kit; stainless screws where allowed)
- Copper mesh (for irregular gaps)
- High-quality sealants: exterior polyurethane sealant; pest-blocking foam for small voids (use only where appropriate)
- Steel wool (temporary packing only; not ideal outdoors long-term)
- Metal flashing (for larger openings at roof penetrations)
- Snap traps (if you plan to trap indoors/garage; avoid poisons around wiring and attic spaces)
- Optional: UV-resistant split-loom conduit or rodent-resistant conduit for exposed wiring runs
Step-by-step: rodent-proofing a rooftop solar setup
1) Confirm you have rodent activity (before you seal)
Start by determining whether you’re dealing with mice, rats, squirrels, or birds—your strategy and materials may differ. Look for:
- Droppings in attic corners, near insulation, or along rafters
- Gnaw marks on wiring insulation, wood edges, or stored items
- Grease rub marks (dark smudges) along beams or entry holes
- Sounds at dusk/dawn: scratching above ceiling or under panels
- Thermal clues: in cold months, animals seek warmth under panels
Actionable tip: Place a few small pieces of painter’s tape across suspected entry points (attic hatch edges, small gaps). If disturbed within 24–48 hours, you’ve likely found a route.
2) Map the “panel-to-attic pathway” (the most common route)
Rodents rarely appear in your attic by magic—they follow predictable paths. Trace these potential routes:
- From trees/fences to the roof edge
- Along the gutter line to roof corners and returns
- Under the panel skirt (panel edge gap) to roof penetrations
- Into attic through soffit vents, fascia gaps, plumbing vents, or roof-jack flashing gaps
Real-world example: Many solar arrays have wiring that enters the attic near the ridge or a conduit drop near the eave. If the roof penetration sealant cracks over time, it can create a neat “invitation” hole rodents exploit—especially if the warm air from the home is leaking out there.
3) Do a safe ground-level inspection of panel edges and roofline
Before climbing anything, inspect from the ground with binoculars. Look under panel edges for:
- Nesting material (leaves, insulation tufts)
- Debris piles collecting in one spot
- Visible mesh damage (if a critter guard already exists)
- Gaps at corners where panels meet roof angles
Safety note: Roof work is hazardous. If you’re not experienced with fall protection, hire a licensed professional who regularly works around solar installations.
4) Shut down solar safely (or coordinate with your installer)
If any work will occur near wiring or panel edges, follow your system’s shutdown procedure (often: turn off AC disconnect, then inverter, then DC disconnect if accessible). Some systems require installer access. Do not cut, move, or clamp wires without guidance.
Actionable tip: Take photos of the array perimeter and every roof penetration before you touch anything. This helps with reassembly and any warranty questions.
5) Remove attractants: clean roof valleys, gutters, and nearby storage
Rodent-proofing isn’t only sealing; it’s also reducing habitat. Remove leaf litter and seed sources:
- Clean gutters and roof valleys (debris holds moisture and nesting material)
- Trim tree branches at least 6–10 feet from the roofline when possible
- Store birdseed and pet food in sealed metal or thick plastic containers
- Move stacked firewood at least 18 inches off the ground and away from exterior walls
Data point: House mice can fit through openings roughly the size of a dime (about 1/4 inch). That’s why focusing on tiny roofline gaps matters as much as big holes.
6) Install a solar “critter guard” around the entire array perimeter
This is the single most impactful step for solar-related rodent issues. A proper guard prevents animals from getting under panels where they can nest and chew wiring. Options include:
- Solar critter guard kit (PVC-coated steel mesh with panel clips): fastest and avoids drilling into frames
- 1/4-inch stainless hardware cloth: durable but must be installed carefully to avoid sharp edges and improper fastening
Best practices:
- Close all edges, especially corners and roof returns (rodents exploit the “last 2 inches” you forgot)
- Keep mesh snug to prevent pushing under it
- Avoid blocking drainage and ensure airflow remains adequate for panel cooling
Real-world example: In service calls where homeowners only guarded the bottom edge (the visible part), rodents often entered from the side facing a dormer or roof valley. Full-perimeter coverage is key.
7) Protect exposed wiring runs with rodent-resistant conduit and proper fastening
Chewed wire insulation is a serious fire and reliability risk. Inspect visible wiring (without tugging) for tooth marks or fraying. For wiring that is exposed in attic spaces or along rafters:
- Use UV-resistant split loom only for light protection; rodents can chew it
- Prefer metal conduit or rodent-resistant flexible conduit where code allows
- Ensure wires are clipped and elevated, not draped across joists where rodents travel
Actionable tip: If you find damaged conductors, stop and call a qualified solar electrician. Patch jobs with tape are not a safe long-term fix.
8) Seal attic entry points near vents, soffits, and penetrations (without trapping animals inside)
After you’ve addressed the panel perimeter, seal the attic side. Focus on:
- Soffit intersections and fascia gaps
- Plumbing vent stacks and roof-jack flashing edges
- Electrical mast and service entry penetrations
- Gable vents (install 1/4-inch metal screening from inside)
Important: Do not seal if you suspect live animals inside. Use one-way exclusion devices or schedule professional exclusion to prevent sealing rodents into the structure, which can lead to odor and secondary pests.
9) Set a targeted monitoring plan (2 weeks) instead of guessing
Once sealing is done, verify success with a short monitoring window:
- Place non-toxic monitoring blocks or flour “tracking patches” near suspected pathways (attic corners, near hatch)
- Use a motion-activated attic camera if feasible
- Check weekly for new droppings or disturbed insulation
Actionable tip: If activity persists after full-perimeter guarding and sealing, the entry point is often a hidden soffit gap or an un-screened gable vent.
10) Schedule maintenance: seasonal roofline checks + solar cleaning awareness
Rodent-proofing isn’t “set it and forget it,” especially in areas with heavy wind, leaf drop, or frequent roof work. Add these to your home maintenance calendar:
- Spring: Inspect mesh, clips, and roof penetrations after storms
- Fall: Clear leaves, confirm guard remains tight before cold weather nesting starts
- After any roofing/solar service: Re-check perimeter (contractors sometimes remove sections and don’t reinstall perfectly)
For additional perspective on how rodents impact homes and cities—and why prevention matters—see coverage and resources from The New York Times, which has reported on rodent trends and the real costs of infestations in the built environment.
Common mistakes to avoid
- Using poison bait in attics: can lead to dead rodents in inaccessible areas, odor issues, and secondary poisoning risk
- Guarding only one side of the array: rodents will find the unprotected edge
- Sealing with foam alone: rodents can chew through many foams; pair with metal mesh where needed
- Ignoring tree access: if branches overhang the roof, you’re constantly re-inviting wildlife
- Touching solar wiring without expertise: safety and warranty risk
Conclusion: Make your solar investment rodent-resistant
Rodent-proofing a solar panel setup is a focused home services project that pays off in reduced repair calls, fewer attic surprises, and better long-term system reliability. By confirming activity, blocking access under the array with a full-perimeter critter guard, protecting wiring, sealing attic entry points, and monitoring for two weeks, you can turn a vulnerable roofline into a hardened one. If you’re uncomfortable with roof work or suspect extensive wiring damage, bring in a qualified rodent exclusion professional and a solar electrician—getting it right the first time is almost always cheaper than repeated fixes.