
Why rodent-proofing has become a “must-do” maintenance item (not a nice-to-have)
Rodent-proofing used to be treated like a seasonal chore—something you dealt with after you heard scratching in the wall. Today, it’s increasingly viewed as routine property maintenance because the downstream costs can be surprisingly high: damaged insulation, chewed wiring, contaminated storage areas, and repeat pest-control callouts. For landlords, facility managers, and homeowners alike, proactive exclusion (blocking entry points) is often the most cost-effective approach.
This article compares several modern, practical rodent-proofing options that maintenance teams actually use: smart sealing with modern materials, classic steel wool (and better alternatives), door sweeps, vent covers, and “whole-building” approaches that combine them. You’ll see where each method works best, what it costs, and how to avoid common mistakes that lead to repeat infestations.
First, a quick reality check: how rodents get in
Mice can squeeze through gaps roughly the size of a dime (about 6–7 mm). Rats need larger gaps, but they’re strong and persistent. In real buildings, entry points are rarely obvious “holes in the wall.” They’re usually maintenance details that drift over time: shrinking caulk lines, sagging door thresholds, utility penetrations that were never sealed, or damaged vents.
If you want a simple way to prioritize your inspection: focus on heat, food smells, and cover. Rodents follow warm air leaks (especially around HVAC and plumbing penetrations), food/garbage routes (dumpsters, pet-food storage, break rooms), and protected travel corridors (foundation ledges, ivy, stacked materials).
Comparison overview: five rodent-proofing approaches in property maintenance
- Approach 1: Smart sealing (sealants + backer materials) for small-to-medium gaps
- Approach 2: Steel wool (and rodent mesh alternatives) for irregular openings
- Approach 3: Door sweeps + threshold upgrades for high-traffic entry points
- Approach 4: Vent, weep-hole, and drain protection (hardware cloth, vent covers, one-way valves)
- Approach 5: Integrated “building envelope” exclusion plan (audit + phased upgrades)
Approach 1: Smart sealing (modern sealants + backer materials)
Best for
Small-to-medium gaps around siding transitions, baseboards, trim, pipe chases, exterior conduit, and cracks in foundations where the structure is stable.
How it works
Instead of “just caulking,” smart sealing uses a combination of:
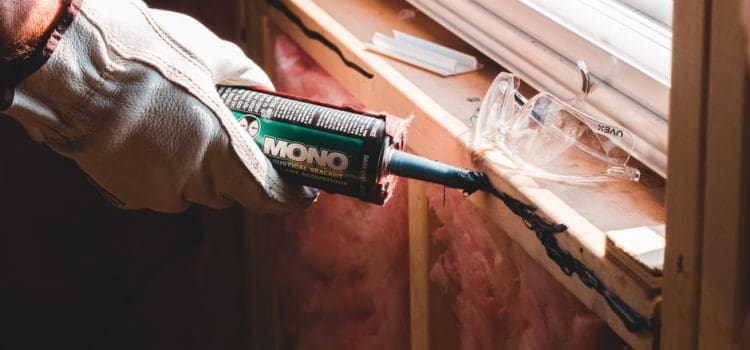
- High-quality exterior sealant (polyurethane or hybrid sealants last longer than basic acrylic latex outdoors)
- Backer rod for deep joints so the sealant bonds correctly
- Rodent-resistant fillers (where needed) such as copper mesh or stainless-steel wool behind the sealant
Pros
- Clean finish that looks professional on rental properties and commercial sites
- Weatherproofing bonus: reduces drafts and moisture intrusion
- Scalable: easy to apply across many units during turnover
Cons
- Sealants fail when applied to dirty, wet, or freezing surfaces
- Not ideal for actively shifting joints (you’ll chase cracks)
- Sealant alone can be chewed through in some locations if there’s no reinforcement
Actionable tip
For utility penetrations (cable/pipe), aim for a layered seal: pack with copper mesh (or stainless mesh), then seal over it. This prevents “one-night re-entry” where a mouse simply reopens soft caulk.
Approach 2: Steel wool (and better long-term alternatives)
Best for
Irregular openings where a perfect seal is hard—gaps around old brick, uneven holes near plumbing, and areas you need to fill quickly during emergency maintenance.
How it works
Steel wool is stuffed into holes to block passage. It’s widely used because it’s cheap and easy to shape. However, many property maintenance teams now prefer copper mesh or stainless-steel mesh because they resist rust and hold their structure longer in damp environments.
Pros
- Fast: good for same-day patching during tenant complaints
- Flexible: fills weird shapes that foam or caulk can’t handle alone
- Low cost per opening
Cons
- Rust risk in exterior or humid areas (steel wool breaks down over time)
- Can be pulled out if not anchored or capped with sealant
- Looks messy if left exposed
Real-world example
A maintenance supervisor in a 1970s garden-style apartment complex found recurring mouse activity in ground-floor units. The culprit wasn’t the units themselves—it was a series of small voids where copper plumbing entered through old brick. Steel wool slowed entry but rusted within months due to irrigation and splashback. Switching to copper mesh packed tight and sealed with an exterior-grade sealant reduced repeat calls dramatically because the fill didn’t degrade during wet seasons.
Approach 3: Door sweeps + threshold upgrades (often the highest ROI)
Best for
Exterior doors, loading entrances, garage-to-house doors, side gates, and any doorway with visible daylight under it.
How it works
Rodents love doors because they’re “guaranteed” traffic points: people open them, food comes in, trash goes out. A proper sweep and threshold system reduces gaps at the bottom and sides. Look for:
- Heavy-duty door sweeps (commercial-grade for high-traffic)
- Threshold plates that maintain consistent contact
- Door alignment (a sagging door can defeat any sweep)
Pros
- Immediate impact: blocks a major entry route
- Energy savings: reduces drafts and HVAC loss
- Easy to inspect: you can visually confirm performance
Cons
- Wears out in busy buildings (plan for replacement cycles)
- Incorrect installation can create new gaps at corners
- Some sweeps drag on uneven floors and get removed by frustrated occupants
Actionable tip
Do a “flashlight test” at night: turn off interior lights, shine a flashlight from inside at the base of the door. If light escapes, you have an access point. Record the worst doors first—your best ROI is usually fixing the top 10% of doors that cause 90% of entry.
Approach 4: Vent, weep-hole, and drain protection (the overlooked entry points)
Best for
Dryer vents, crawlspace vents, roof/soffit vents, foundation weep holes, and floor drains in basements or utility rooms.
How it works
These openings exist for a reason—airflow and drainage—so sealing them shut is a mistake. Instead, you protect them with the right hardware:
- Metal vent covers designed for the specific vent type (dryer, soffit, etc.)
- Hardware cloth (typically 1/4-inch galvanized mesh) where appropriate
- Drain backflow preventers or one-way valves where rodents are entering through plumbing lines
Pros
- Stops stealthy entry routes that tenants rarely notice
- Durable when properly installed
- Reduces nesting opportunities in ducting and voids
Cons
- Wrong mesh size can trap lint/debris or restrict airflow (especially dryer vents)
- Poor fastening can create rattles or gaps over time
- Some solutions require code-aware choices (e.g., dryer vent restrictions)
Actionable tip
Create a “vent map” for your property: list every vent and opening by location, type, and condition. Add a scheduled inspection after storm season. Wind damage and pest pressure often spike together.
Approach 5: Integrated building-envelope exclusion (audit + phased upgrades)
Best for
Multi-unit properties, mixed-use buildings, older homes with multiple additions, and sites with recurring problems despite repeated trap-and-remove cycles.
How it works
This approach treats rodent-proofing as a maintenance program rather than a one-off fix:
- Exterior inspection (foundation line, utility entries, roofline transitions)
- Interior verification (droppings, rub marks, gaps under cabinets, utility closets)
- Phased remediation: start with high-probability entry points (doors, vents, utility penetrations), then move to secondary areas
- Monitoring: non-toxic tracking blocks or bait station monitoring outside (where legal and appropriate), plus follow-up inspections
Pros
- Long-term results and fewer emergency calls
- Budget-friendly over time because you plan work in batches
- Better documentation for compliance, tenant communication, and contractor coordination
Cons
- Requires coordination across trades (HVAC, plumbing, general maintenance)
- Upfront time investment to audit and document
Data point that supports a prevention-first mindset
While exact costs vary by region and building type, prevention is consistently cheaper than repeated reaction. Even mainstream consumer coverage increasingly emphasizes exclusion and sanitation as the foundation of control. For an accessible overview of why infestations can surge in dense areas—and why building conditions matter—see reporting and resources at The New York Times rodent coverage and explainers, which can help property teams communicate risk and remediation priorities to stakeholders.
Which option should you choose? A practical decision guide
If you manage a high-traffic building (retail, multifamily, mixed-use)
- Prioritize Approach 3 (door sweeps/thresholds) and Approach 4 (vents/drains).
- Backstop with Approach 5 (audit + phased upgrades) so repairs don’t get undone by the next contractor.
If you’re maintaining an older home with lots of penetrations and additions
- Use Approach 1 (smart sealing) for clean, lasting exterior results.
- Keep Approach 2 (mesh/wool) for irregular voids, but cap it with sealant or a solid cover.
If you’re facing repeat infestations despite traps
- Assume there’s an unaddressed entry point. Trapping without exclusion often becomes an endless loop.
- Run a structured inspection: start at doors, then utilities, then vents, then roofline transitions.
Maintenance checklist: do this in one afternoon
- Walk the exterior: note gaps at utility lines, cracked foundation edges, and siding transitions.
- Check doors: look for daylight and worn sweeps; measure the gap under doors (anything near a dime’s thickness is a concern for mice).
- Inspect vents: confirm covers are intact and fastened; look for chew marks or nesting debris.
- Look for “runways”: greasy rub marks along walls, especially behind appliances and in storage rooms.
- Prioritize fixes: start with the biggest, most active entry points before spending money on cosmetic sealing.
Conclusion: the best rodent-proofing is the one your property can sustain
In property maintenance, the “best” rodent-proofing method isn’t a single product—it’s the approach that fits your building’s weak points and your team’s ability to inspect and maintain it. Door sweeps and thresholds often deliver the fastest results. Smart sealing provides professional, weather-resistant performance when paired with rodent-resistant backing. Vent and drain protection closes the stealth routes that undermine everything else. And for recurring issues, an integrated building-envelope plan turns rodent control from a repeating emergency into a manageable maintenance cycle.
Choose two or three high-impact upgrades, document them, and schedule follow-ups. When exclusion becomes routine, rodents have fewer opportunities—and your property stays cleaner, safer, and cheaper to operate.