
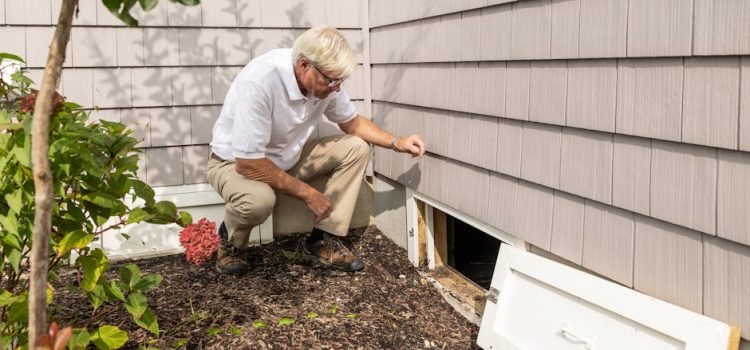
What is a “Rodent Pressure Map,” and why is it a smart property maintenance trend?
A “Rodent Pressure Map” is a simple, property-specific way to identify where rodents are most likely to enter, travel, and nest—before you spend money on sealing, repairs, or pest control. Instead of treating rodent proofing as a one-off task (“seal a few holes and hope”), you create a repeatable maintenance process that prioritizes the areas with the highest risk.
Think of it like preventive maintenance for plumbing or HVAC: you inspect the system, identify weak points, and fix the highest-impact items first. A rodent pressure map does the same for your building envelope and site features (landscaping, trash storage, drainage, outbuildings).
- Pressure = how attractive or accessible an area is to rodents (food, water, shelter, entry gaps).
- Map = a quick diagram or checklist by zone: exterior perimeter, roofline, doors, utility penetrations, garage, crawlspace, and interior “hot spots.”
How do I build a Rodent Pressure Map in under 60 minutes?
You only need a phone camera, a notepad, and (ideally) a flashlight. Walk the property in a consistent loop and score each zone from 0–3:
- 0 = low risk, no visible gaps or attractants
- 1 = minor maintenance issues (hairline gaps, light clutter)
- 2 = clear vulnerabilities (openings, worn sweeps, vegetation contact)
- 3 = active evidence or major access (droppings, rub marks, burrows, large gaps)
Then list the top five “3” zones to address first. This prevents the common mistake of spending time on low-value fixes (like sealing tiny cracks indoors) while ignoring the big highway (like a damaged soffit or an unsealed utility line outside).
What should I photograph and record?
- Any gap near pipes, wires, AC lines, or hose bibs
- Door bottoms and garage thresholds in daylight (look for visible light)
- Foundation line (cracks, weep holes, missing mortar, siding gaps)
- Vegetation touching the structure (vines, branches, dense shrubs)
- Trash and compost areas (lids, spills, and ground scatter)
- Signs of activity: droppings, gnawing, grease/rub marks, burrows
Which maintenance “micro-failures” cause most rodent problems?
Rodent issues often start with small, overlooked maintenance failures that compound over time. The most common ones are:
- Door sweep fatigue: A door sweep that’s missing, stiff, or warped creates a dependable nightly entry route—especially in garages, side doors, and utility rooms.
- Unsealed penetrations: Utility lines (gas, water, cable, HVAC condensate lines) are frequent entry points if gaps aren’t sealed with rodent-resistant materials.
- Soffit and fascia gaps: Minor roofline damage can become an attic nesting issue quickly.
- Foundation transitions: Where siding meets foundation, rodents exploit inconsistent overlaps, cracks, or deteriorated flashing.
- Clutter “bridges”: Stored items against exterior walls (firewood, bins, building materials) create shelter and hiding routes.
Actionable tip: if you can slide a pencil into a gap around a door, pipe, or corner seam, treat it as a priority inspection point. Even when mice can’t fit through a specific opening, gaps often lead to other weaknesses nearby.
How can I prioritize repairs without wasting money?
Use a “stop-the-highway-first” rule. Prioritize repairs that remove the easiest access routes and the strongest attractants. A practical order of operations looks like this:
- Step 1: Food control (trash, pet food storage, bird seed, compost handling)
- Step 2: Entry control (doors, garage, utility penetrations, vents, roofline)
- Step 3: Shelter reduction (clutter, dense groundcover, woodpiles)
- Step 4: Interior hardening (pantry containers, pipe chases, cabinet voids)
Real-world example: A property manager of a small multi-unit building may spend on repeated trapping in basements, but if trash bins are missing tight lids and a rear door has a 1/2-inch gap, the population pressure remains constant. Fixing the door sweep and bin containment typically reduces recurring incidents and service calls.
What are the highest-risk zones most property owners miss?
Even diligent owners often miss these:
- Garage corners and slab edges: Small separations between slab and framing can become entry points.
- Under decks and stairs: These create shaded, quiet nesting conditions—especially if vegetation is present.
- Gutter and downspout discharge areas: Poor drainage keeps soil damp, which can increase burrowing and attract insects rodents feed on.
- Outdoor kitchen / grill pads: Grease drips and food residue can sustain activity long after cooking.
- HVAC platforms and line sets: The foam/rubber around lines degrades; gaps appear where lines enter walls.
How do seasonal changes affect rodent pressure in a property maintenance plan?
Seasonality matters because rodents respond to temperature shifts, food availability, and shelter needs.
- Fall: Entry pressure rises as rodents seek warmth and stable nesting sites. This is the best time for exterior sealing and door sweep checks.
- Winter: Indoor activity becomes more noticeable (sounds in walls, droppings in storage). Focus on interior sanitation and monitoring while maintaining exterior integrity.
- Spring: Breeding activity increases; exterior burrows and yard activity become more visible. Repair winter damage and reset landscaping clearances.
- Summer: Outdoor food/water sources (irrigation leaks, fruit trees, compost) can drive site pressure. Focus on drainage and waste control.
Actionable tip: schedule two annual “pressure map” walks—one in early fall and one in early spring. Many property managers align these with gutter cleaning or seasonal HVAC servicing to bundle maintenance efficiently.
What materials work best for rodent-resistant sealing?
Rodent-resistant sealing is about choosing materials that don’t degrade quickly and can’t be easily gnawed or pushed aside. The best choice depends on the opening and location.
- Metal mesh/hardware cloth: Useful for larger gaps and vent protection when installed securely.
- Steel wool (paired with sealant): Helpful for irregular gaps, but must be properly sealed to prevent moisture issues and dislodging.
- Rodent-resistant sealants: Designed to resist gnawing better than standard foam. Use where appropriate and follow manufacturer instructions.
- Door sweeps and thresholds: Heavy-duty commercial-grade sweeps generally last longer in high-traffic doors.
Important: avoid relying on standard expanding foam alone for exterior gaps. It can be chewed or weather-damaged. If foam is used, combine it with a gnaw-resistant barrier.
How do I know whether I’m dealing with mice, rats, or something else?
Correct identification helps you target the right maintenance fixes.
- Mice: Smaller droppings (often rice-sized), frequent indoor sightings, activity in kitchens/pantries, and entry around doors and small gaps.
- Rats: Larger droppings, stronger gnaw marks, burrows near foundations, and more outdoor travel routes (fences, walls, utility lines).
- Squirrels/bats/birds: More roofline and attic-focused issues; different noise patterns and entry points.
If you’re unsure, document evidence (photos of droppings, rub marks, burrow holes) and use it to guide repairs and professional support.
What data points should I track to prove my rodent-proofing maintenance is working?
A property maintenance plan improves when you measure outcomes. Track these monthly:
- Sightings and evidence logs: Date, location, and type (droppings, gnawing, noises).
- Service call frequency: Number of tenant/occupant complaints or pest control visits.
- Repair completion list: What was sealed, when, and with what material.
- Waste control compliance: Lid usage, overflow incidents, and trash area cleanliness checks.
- Moisture and drainage notes: Leaks repaired, standing water eliminated, downspout extensions added.
Real-world example: If basement sightings drop from weekly to zero after door sweep replacement and utility gap sealing, that is a strong indicator the “entry highway” was cut off. If sightings persist, your map helps pinpoint the next likely zone (often roofline, vents, or an adjacent storage clutter area).
How does poor waste management increase rodent pressure around buildings?
Waste handling is one of the strongest predictors of rodent activity because it provides consistent calories. Even small, repeated food sources (loose trash bags, spilled pet food, uncleaned grill trays) can maintain a local population.
Many municipalities and public health agencies regularly highlight rodents as an urban challenge tied to waste and environmental conditions. For broader context on rodents and city environments, you can review reporting and explainers from BBC News coverage on rodents and public health.
- Actionable tip: Use bins with tight-fitting lids, keep bins on a hard surface when possible, and rinse containers that held food (especially meat, dairy, sugary liquids).
- Actionable tip: Move dumpsters/bins away from doors where feasible, and keep the surrounding pad swept—tiny scraps add up over time.
What’s a practical “7-day reset plan” if I suspect rodent activity?
This is a maintenance-first approach you can start immediately. It’s not a substitute for professional pest control when needed, but it often reduces pressure quickly.
- Day 1: Run a nighttime flashlight check around trash/compost/grill areas; clean spills and secure lids.
- Day 2: Inspect and replace door sweeps on garage/side doors; check for daylight at thresholds.
- Day 3: Seal obvious exterior penetrations (pipes/lines) using rodent-resistant materials appropriate for the opening.
- Day 4: Trim vegetation back from the building (create a clearance band); remove “clutter bridges” like stacked items against walls.
- Day 5: Inspect roofline/soffits and vents from ground level; schedule repairs for any visible gaps or damage.
- Day 6: Address moisture: repair hose bib leaks, fix irrigation overspray, add downspout extensions if pooling occurs.
- Day 7: Update your Rodent Pressure Map and set calendar reminders for seasonal re-checks.
How do I integrate rodent proofing into an ongoing property maintenance schedule?
Rodent proofing works best when it’s built into routine inspections rather than treated as a reactive emergency. Add these checkpoints:
- Monthly: Trash area inspection, door sweep check, quick perimeter walk for new gaps or burrows.
- Quarterly: Utility penetration review, garage threshold inspection, storage/clutter review.
- Biannually (spring/fall): Full Rodent Pressure Map update, vegetation clearance, roofline/vent review.
- After major weather: Check for storm damage at soffits, fascia, and fence lines; verify gates and doors still close tightly.
Conclusion: What’s the biggest takeaway for rodent-proof property maintenance?
The biggest improvement comes from treating rodent prevention as a measurable, repeatable maintenance system. A Rodent Pressure Map helps you focus on the zones that actually drive infestations: entry points, attractants, and shelter. When you combine targeted sealing with waste control, vegetation management, and seasonal inspections, you reduce recurring issues and protect the property’s structure, hygiene, and tenant/occupant experience.
If you want a simple starting point, do one perimeter walk this week, score each zone 0–3, and fix your top three “pressure points” first. That single habit often prevents months of recurring rodent problems later.