
Rodent-proofing by design: why upgrades beat gadgets
Traps and poison can reduce an active infestation, but they rarely solve the structural reasons rodents get inside in the first place. “Rodent-proofing by design” is the approach used by many commercial facilities: you remove access (entry points), attraction (food/water), and shelter (nesting sites) so the building becomes a poor habitat. The result is long-term control with fewer callbacks and less reliance on chemicals.
Below are nine targeted building and maintenance upgrades that consistently deliver high ROI for homeowners, landlords, and facility managers. Each item includes practical specifications you can apply immediately and examples of where it works best.
1) Install a door sweep system rated for rodent pressure (not just drafts)
Most “draft” sweeps are too soft and too high to stop a mouse. A mouse can squeeze through gaps roughly the width of a pencil, and a rat can exploit surprisingly small openings when motivated. Your goal is a continuous, tight seal—especially at the corners and the latch side.
- Spec to use: Choose heavy-duty sweeps with a rigid carrier and dense neoprene/brush combination; aim for no more than 1/4 inch clearance across the threshold.
- Corner detail: Add “wrap-around” corner caps or door shoes to prevent the common corner gap where sweeps don’t meet jamb seals.
- Real-world example: Restaurants often see rodent activity spike after hours due to frequent deliveries; upgrading rear entry sweeps and adding an automatic closer reduces “accidental open time” that attracts rodents.
2) Upgrade garage doors with brush seals and bottom astragals (garages are the #1 gateway)
Garages combine multiple risk factors: large door spans, stored seed/pet food, and wall penetrations for utilities. The typical rubber bottom seal hardens over time and leaves daylight—daylight is your quick diagnostic: if light gets in, rodents can too.
- Spec to use: Install side and top brush seals plus a high-quality bottom astragal. Adjust door limit settings so the door compresses the seal fully.
- Tip: Don’t forget the man door into the garage—seal it like an exterior door, including the threshold.
- Actionable check: Close the garage door and look from inside. Mark every light leak with painter’s tape, then address each point systematically.
3) Replace plastic vent covers with 1/4-inch metal hardware cloth “screens that bite back”
Dryer vents, foundation vents, and crawlspace vents are frequent entry points. Plastic louvers crack, and thin “bug screens” are easily torn. A rodent-proof vent screen should be rigid, corrosion-resistant, and mechanically fastened.
- Spec to use: Use galvanized or stainless 1/4-inch hardware cloth. Avoid chicken wire (too flexible) and window screen (too weak).
- Install tip: Sandwich the mesh between the vent frame and the structure when possible, or fasten with screws and washers (not staples).
- Dryer vent note: Use purpose-built metal pest guards that don’t trap lint. Clean the duct regularly to avoid a fire hazard.
4) “Seal the donut”: rodent-proof pipe penetrations with escutcheon plates + sealant + mesh
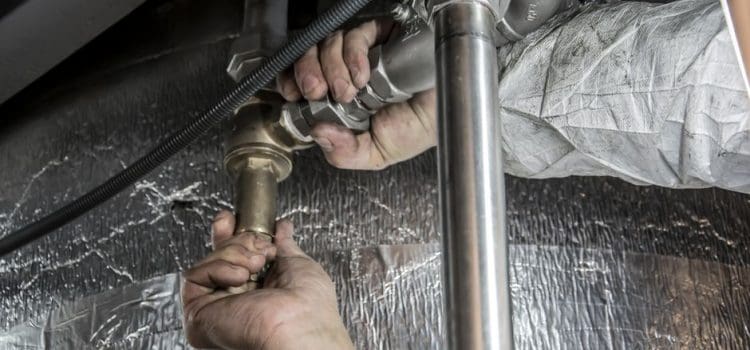
Rodents love utility chases. The mistake is relying on foam alone—many rodents can chew it or pull it away. The best practice is a layered seal that resists gnawing and movement.
- Layered method: Pack gaps with copper mesh or stainless wool (avoid regular steel wool where moisture is present), then seal with high-quality exterior sealant. Finish with a metal escutcheon plate where feasible.
- Where to focus: Under kitchen sinks, behind stoves, around water heaters, and at exterior hose bibs.
- Pro tip: If the pipe is warm (e.g., hot water line), choose sealants rated for temperature changes to prevent cracking.
5) Convert “open soffits” to closed, vented soffits with rodent-resistant intake protection
Rooflines are overlooked. Rats in particular can climb textured walls, vines, and rough downspouts to reach the eaves. Once in the soffit, they can travel to attic voids and insulation.
- Spec to use: Ensure soffit vents are protected with metal mesh (not flimsy plastic). If you have gaps at fascia returns, close them with cut-to-fit blocking.
- Actionable inspection: At dusk, watch rooflines for 10 minutes. Movement near gutters or eaves can indicate roof-rat pathways.
- Example: Homes with mature fruit trees overhanging roofs often experience roof-rat activity; trimming branches 3–6 feet away from the roofline reduces access dramatically.
6) Install a “cleanable perimeter zone” (a 12–18 inch strip that removes cover)
Rodents prefer to travel under cover. Dense groundcover, stacked firewood, and clutter tight to the foundation create protected runways. A simple landscaping change can make your property feel “exposed,” discouraging travel and nesting.
- Spec to use: Create a 12–18 inch vegetation-free strip around the foundation using gravel, pavers, or bare mulch kept thin and dry.
- Clutter control: Store firewood at least 18 inches off the ground and several feet from the structure; rotate and inspect routinely.
- Why it works: Predation risk changes rodent behavior. For a general science-backed overview of rodent ecology and how they interact with environments, see National Geographic’s reporting on animals and wildlife behavior.
7) Add “tamper-resistant waste flow”: bins, liners, and pickup timing that starve the problem
Food availability drives rodent reproduction and territory expansion. Many infestations persist because dumpsters and outdoor bins leak calories nightly. Correcting waste handling is often the single fastest way to reduce pressure—especially in multi-family housing.
- Spec to use: Use rodent-resistant bins with tight-fitting lids and intact hinges. Replace cracked wheels and warped lids immediately.
- Operational tip: Rinse recyclables, bag food waste, and avoid storing overflow bags outdoors even “just overnight.”
- Data point you can measure: Track how often lids are found open or ajar. If it happens weekly, your site is feeding rodents weekly—fix the process, not just the symptoms.
8) Choose insulation and storage practices that deny nesting material
Rodents don’t just enter for food; they enter for nesting. Attics, crawlspaces, and wall voids provide warmth and quiet. If you’ve ever found shredded paper, fabric, or fiberglass pulled into a cavity, you’ve seen how quickly nesting takes hold.
- Upgrade idea: In vulnerable areas (garage walls, knee walls, utility rooms), use more durable finishes and keep stored textiles in sealed totes.
- Attic best practice: If you’ve had prior activity, don’t just add insulation—first confirm exclusion is complete, then remove contaminated insulation where necessary and seal entry points before re-insulating.
- Example: Pet bedding stored in garages is a frequent nesting target. Switching to sealed containers and keeping bedding elevated reduces pull-through dramatically.
9) Build a “monitoring loop” with non-toxic detection so you catch breaches early
Rodent-proofing is not a one-time event; buildings move, seals degrade, and habits slip. The difference between a one-mouse incident and a recurring infestation is often whether you detect new activity within days or after weeks.
- Tools: Use non-toxic monitoring bait blocks or tracking patches in high-risk zones (garage corners, behind appliances, near utility penetrations).
- Routine: Check weekly for one month after improvements, then monthly. Log findings (date, location, sign type) to spot patterns.
- Actionable threshold: If you see fresh droppings twice in the same zone within 7–10 days, assume an access point is still open and re-inspect the nearest exterior line-of-entry.
Conclusion: make the building the solution
Long-term rodent control comes from treating your structure and routines as the primary “product,” not relying on constant trapping cycles. Start with the biggest gateways (doors, garage, vents), then move outward to rooflines and landscaping, and finally lock in success with waste discipline and monitoring. When these nine upgrades work together, you don’t just remove rodents—you remove the reasons they return.
If you want the fastest path to results, prioritize: door/garage sealing, vent and penetration hardening, and waste control. Those three changes alone often reduce rodent pressure enough that any remaining issues become easy to identify and fix.