
Why a “Rodent-Proof Pantry Zone” is the pest-control upgrade most homes need
Most rodent problems don’t start with a dramatic “mouse sighting.” They start quietly: a bag of rice with a tiny hole, a few droppings under the toaster, a faint scratching at night. And once rodents figure out your kitchen is a reliable buffet, they’ll return (and tell their friends).
The good news: you can stop that cycle by building a dedicated “Rodent-Proof Pantry Zone.” Think of it as a mini system inside your kitchen—food storage, sealing, monitoring, and habits—all designed to make your home boring and inaccessible to mice and rats. This guide is poison-free by default and focuses on prevention and exclusion (the long-term fix).
One quick reality check: rodents are not just “gross,” they’re risky. Rats and mice can contaminate food and surfaces via droppings and urine, and they’re also well-known for chewing wires. If you want a broader perspective on how cities and households are dealing with rats (and why it’s a growing topic), check out reporting from The Guardian’s coverage on urban rat issues—it’s a useful reminder that prevention beats panic.
Step-by-step: How to create a Rodent-Proof Pantry Zone
1) Map your “food scent” hotspots (10 minutes)
Rodents are basically tiny, persistent scent detectives. Start by identifying the strongest smell sources and the easiest access points.
- Hotspots to check: pantry shelves, under the sink, behind the fridge, toaster/crumb areas, pet food station, snack drawer, potato/onion bins.
- Fast test: open each cabinet and sniff. Anything with a strong odor (nuts, cereal, chocolate, pet kibble) goes on your priority list.
Real-world example: In many homes, the “rodent buffet” ends up being pet food in a paper bag stored on the floor. That’s an easy win: move it to a sealed container and off the ground.
2) Do a “crumb audit” and remove micro-food (20–30 minutes)
You don’t need a dirty kitchen to attract rodents. You just need routine micro-food: crumbs, grease film, spilled bird seed, or cereal dust. Mice can survive on surprisingly small amounts of food.
- Pull out the toaster tray and clean it.
- Vacuum under the fridge and oven (a crevice tool helps).
- Wipe cabinet corners and shelf edges where crumbs collect.
- Don’t forget the “snack zone” (couch side tables, kids’ desks, gaming areas) if it’s near the kitchen.
Actionable tip: Use a vacuum first, then a degreasing cleaner. Rodents follow scent trails, and grease holds odor longer than you think.
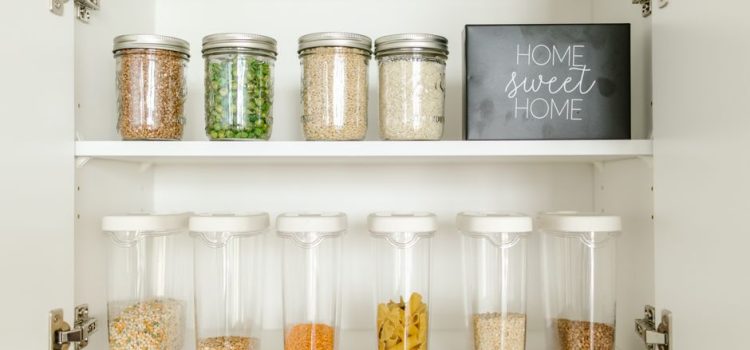
3) Upgrade storage: switch 80% of pantry items to rodent-resistant containers (same day)
This is the core of the Pantry Zone. You’re cutting off food access even if a rodent gets inside.
- Best options: thick glass jars with gasket lids, metal tins, and heavy-duty BPA-free containers with locking lids.
- Avoid: thin plastic bags, cardboard boxes, and “zip bags” as the final layer.
- Priority foods: flour, cereal, rice, pasta, nuts, dried fruit, chocolate, baking mixes, pet food, bird seed.
Data point you can use: A single mouse can squeeze through a gap about the size of a dime (roughly 6–7 mm). If they can get in, they can definitely chew through cardboard.
Real-world example: If you buy bulk rice or flour, split it into multiple sealed containers instead of one huge bin. If one container gets compromised, you won’t lose everything.
4) Create a “high-risk shelf” and move it up (15 minutes)
Rodents are ground-oriented. While they can climb, it’s harder for them when you reduce footholds and access.
- Designate the bottom pantry shelf as non-food (paper towels, foil, cookware).
- Move all edible items to mid and upper shelves.
- Keep at least 6 inches of clearance off the floor for any food storage.
Actionable tip: Store potatoes and onions in ventilated, lidded bins rather than open baskets—those smells can travel.
5) Seal the “kitchen envelope”: close the gaps that matter most (45–90 minutes)
This is where rodent proofing becomes real pest control. You’re not just “cleaning”; you’re denying entry.
- Under-sink pipe gaps: Stuff with copper mesh and finish with a rodent-resistant sealant.
- Toe-kicks and cabinet voids: Look for gaps where plumbing enters or where cabinets meet walls.
- Behind appliances: Check wall penetrations for the fridge water line, gas line, and electrical outlet openings.
- Door sweeps: If you can see light under an exterior door, rodents can often get in. Install a tight sweep.
Materials that work: copper mesh, steel wool (short-term), hardware cloth, metal flashing, high-quality sealant. Rodents can chew expanding foam alone, so treat foam as a filler—not the final barrier—unless it’s specifically rodent-resistant and paired with mesh.
Real-world example: A common entry point is the gap around the dishwasher line under the sink. It’s hidden, warm, and often leads straight into wall voids.
6) Add “quiet monitoring” that doesn’t clutter your life (10 minutes)
Monitoring tells you whether your changes are working. You want simple, low-drama tools.
- Place 2–4 snap traps (unset at first if you’re cautious) or monitoring stations along walls: behind the fridge, under the sink, near the pantry, and in the garage-side wall if applicable.
- Check weekly for droppings, gnaw marks, or disturbed bait (if using non-toxic monitoring blocks).
- Track findings in a quick note on your phone: date + location.
Actionable tip: Rodents typically travel along edges. Putting monitoring tools in the middle of the floor is way less effective than placing them parallel to a wall.
7) Fix the “water buffet” (15–25 minutes)
If rodents can’t access water, they’re less likely to set up shop. Kitchens are full of accidental water sources.
- Repair slow drips under the sink (even “one drop every few seconds” matters over time).
- Don’t leave pet water bowls out overnight if you’re actively dealing with activity—pick up before bed and put down in the morning (when practical).
- Dry the sink basin at night and keep dish sponges wrung out and elevated.
Real-world example: Condensation pans under fridges can become a hidden water source. If you’ve had rodent issues, inspect and clean that area during your under-fridge vacuum session.
8) Build a “trash discipline” that doesn’t feel like a chore (same day)
Trash is basically a nightly rodent party invitation if it’s easy to access.
- Use a trash can with a tight lid (step pedal is great, but ensure the lid closes firmly).
- Empty kitchen trash before bed if it contains food scraps—especially meat packaging or sweet items.
- Rinse recyclables (soda cans, jars) quickly before tossing them into the bin.
Actionable tip: If you compost, keep a sealed countertop container and take it out daily. Compost pails with charcoal filters can reduce odor (less scent = less attraction).
9) Create a 5-minute nightly reset routine (the secret weapon)
This is what makes the Pantry Zone last. The point isn’t perfection—it’s consistency.
- Wipe counters and sweep obvious crumbs.
- Put all food away (no bread bags on the counter overnight).
- Run a quick check: sink dry, trash closed, pet food sealed.
Real-world example: Homes that “only” leave a fruit bowl and a bag of crackers out often see repeat activity. Once everything is sealed for two weeks straight, the problem frequently drops off because the kitchen stops paying out.
10) If you find droppings: clean safely and upgrade your plan (as needed)
If you discover droppings, don’t dry-sweep them. That can kick particles into the air.
- Ventilate the area.
- Wear gloves; consider a mask if the area is dusty.
- Spray droppings with disinfectant and let sit (follow product directions), then wipe with paper towels and seal in a bag.
- Re-check your exclusion work: droppings often appear near entry routes.
Actionable tip: Droppings that keep showing up in the exact same place usually mean there’s a nearby gap or hidden runway. Focus on sealing and monitoring that zone rather than scattering solutions across the house.
Troubleshooting: why rodents still show up even in “clean” kitchens
- They’re nesting nearby: garage clutter, storage rooms, or dense landscaping against the house can support nesting.
- One tiny gap remains: the most common reason. Re-check pipe penetrations and door thresholds.
- Food is sealed, but smells remain: grease buildup behind the stove, old crumbs in drawers, or unwashed recycling can keep scent trails alive.
If activity persists after you’ve sealed, cleaned, and monitored for 2–3 weeks, it may be time for a professional inspection. A good pest pro will focus on exclusion first (not just traps) and should be able to show you the entry points they’re addressing.
Conclusion: Make your kitchen boring, sealed, and easy to monitor
A Rodent-Proof Pantry Zone isn’t about living in a sterile bubble. It’s about removing the three things rodents need: easy food, easy water, and easy access. Once you’ve containerized the pantry, sealed the kitchen envelope, and built a simple nightly reset, you’ll notice a shift: fewer signs, fewer surprises, and a kitchen that feels calmer.
Do the steps in order, and you’ll get the biggest payoff with the least effort—plus a setup you can maintain without thinking about it every day.