
Why “smart” rodent proofing is trending (and why it works)
Rodent proofing has always been a home-services essential, but the newest wave is more targeted than “set traps and hope.” Homeowners are combining building-science basics (air sealing, moisture control, and material selection) with simple monitoring (cameras, leak sensors, and inexpensive tracking methods) to prevent infestations instead of reacting to them.
This roundup collects practical upgrades, tools, and routines that reduce the two things rodents are constantly seeking: access and resources (food, water, warmth, nesting material). You don’t need to do everything at once—many of the highest-impact fixes are quick and affordable.
Roundup: 15 upgrades and tactics that deliver real results
1) Start with a “1/4-inch rule” exterior audit
Mice can squeeze through openings around the size of a dime, and rats don’t need much more. A strong first step is a perimeter walk to find gaps at:
- Utility penetrations (AC lines, cable, gas, irrigation)
- Garage corners and slab-to-siding seams
- Door thresholds and weatherstripping
- Weep holes, brick gaps, and loose soffits
Actionable tip: Use a small ruler or a 1/4-inch drill bit as a quick gauge. If it fits, it’s worth sealing.
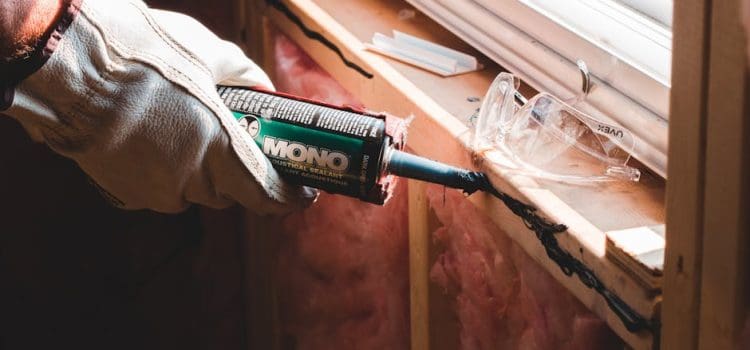
2) Seal gaps with rodent-resistant materials (not just foam)
Expanding foam alone is often a temporary fix because rodents can chew it. Use foam only as a backing, paired with chew-resistant barriers:
- Stainless steel wool (better than regular steel wool for rust resistance)
- Copper mesh for irregular cavities
- Hardware cloth (1/4-inch galvanized mesh) for vents and larger openings
- Cement-based patch or mortar for masonry gaps
Real-world example: If you have a 1-inch gap where the AC line enters the house, pack copper mesh tightly, then finish with exterior-grade sealant to lock it in place.
3) Upgrade door sweeps and garage seals—the “rodent highway” fix
Garage doors and side doors are among the most common entry points. Replace worn bottom seals and add brush-style or heavy-duty rubber door sweeps on man doors. For garage corners, install side seals that contact the door edge firmly.
Actionable tip: At night, stand inside the garage with the door closed and lights off. If you see daylight around edges, rodents can likely exploit the gap.
4) Screen foundation vents and roofline openings correctly
Many homes have vents that are effectively “open invitations.” Install 1/4-inch metal mesh over:
- Foundation vents (without blocking airflow)
- Gable vents and attic vents (use pre-made metal screens when possible)
- Dryer exhaust (use a rodent-proof vent cover with a damper)
Important: Avoid plastic vent covers outdoors—UV and chewing can shorten their lifespan.
5) Fix water first: moisture control is rodent control
Rodents don’t just follow food; they follow reliable water sources. A slow drip under a sink or a sweating pipe can support ongoing activity. Add a simple leak-check routine:
- Check under sinks, behind toilets, and at water heater connections monthly
- Use inexpensive water-leak sensors under sinks and near laundry
- Insulate cold-water pipes in humid basements/crawlspaces
Data point: Even minor plumbing leaks can waste hundreds to thousands of gallons annually; that same persistent moisture can also make crawlspaces and wall cavities more hospitable to pests.
6) “Food discipline”: lock down pantry and pet feeding habits
In many homes, rodents aren’t living off “trash”—they’re living off easy calories. Tighten up these common sources:
- Store dry goods in hard containers (thick plastic or glass) rather than bags
- Stop leaving pet food out overnight; switch to timed feeding if needed
- Clean under the stove and fridge routinely (crumbs accumulate fast)
Practical upgrade: Add a lidded, metal step-can for kitchen waste and empty it frequently—especially if it contains food scraps.
7) Rodent-proof your compost and outdoor trash setup
Outdoor attractants can pull rodents toward the structure. Use a compost bin with a locking lid and rodent-resistant base, and keep trash bins closed and clean.
Actionable tip: Don’t rinse bins with a hose next to the foundation—runoff can soak soil right where rodents like to burrow.
8) Tidy the “hidden harborages”: storage, clutter, and cardboard
Cardboard is popular for nesting and easy to chew. In basements, garages, and attics:
- Store items in sealed plastic totes
- Keep storage 12 inches off the floor when possible
- Reduce soft nesting material (paper piles, fabric stacks)
Real-world example: A garage with stacked cardboard boxes against an exterior wall is a classic nesting zone, especially if there’s a water heater closet or adjacent laundry room.
9) Use landscaping as a barrier, not a bridge
Overgrown landscaping can hide burrows and provide cover. A clean perimeter makes your home less attractive and makes activity easier to spot.
- Keep shrubs trimmed back 12–18 inches from siding
- Maintain a clear “inspection strip” along the foundation (gravel works well)
- Store firewood at least 20 feet from the home and elevated
Actionable tip: If you have ivy or groundcover right up to the wall, consider pulling it back; it’s excellent cover for rodents traveling along the foundation.
10) Track first, then target: flour “test zones” and non-toxic monitoring
If you’re unsure where activity is happening, place thin dustings of flour (or use non-toxic tracking powder) along suspected runways near walls. Check for footprints and tail drags the next morning.
Why it helps: You can confirm activity and pinpoint travel routes before sealing or placing traps, increasing success and reducing guesswork.
11) Choose traps strategically (and place them correctly)
Trapping is most effective when combined with exclusion. For indoor mice:
- Use quality snap traps or enclosed traps in high-traffic runways
- Place traps perpendicular to the wall, trigger end touching the wall
- Use multiple traps—single-trap strategies often fail
Actionable tip: Rodents tend to run tight to edges. Placing traps in open areas reduces capture rates.
12) Crawlspace upgrades: vapor barriers and access door sealing
Crawlspaces can be a long-term source of rodents because they provide concealment, moderate temperatures, and moisture. Consider:
- Sealing crawlspace access doors with weatherstripping and latches
- Installing or repairing a vapor barrier to reduce humidity
- Screening vents properly (if your crawlspace design uses venting)
Real-world example: A loose crawlspace access panel with a warped frame can be enough for repeated entry, even if the rest of the home is sealed.
13) Attic and roofline checks: prevent “top-down” infestations
Not all infestations start at ground level. Check for:
- Gaps at fascia boards and soffit intersections
- Damaged roof vents and loose flashing
- Tree branches within 6–10 feet of the roof
Actionable tip: Look for greasy rub marks and small droppings near attic access points—these are common indicators of repeat travel.
14) Use “evidence-led” sanitation: what to clean and what not to disturb
Sanitation is critical, but if you’re actively tracking an entry point, don’t wipe away every clue immediately. Document and mark:
- Dropping locations
- Gnaw marks
- Grease/rub trails along baseboards
After you identify routes, clean thoroughly using appropriate protective gear and disinfecting methods, especially in enclosed spaces.
15) Know when to call a pro—and what to ask for
Persistent activity, multiple entry points, or rodents in wall cavities often require professional exclusion work. When you call a rodent-proofing service, ask for:
- A written exclusion plan specifying materials (mesh type, sealants, repairs)
- Photos of repaired entry points (before/after)
- Monitoring recommendations and follow-up timeline
- Guidance on sanitation and habitat changes
Service insight: The best long-term results usually come from a combination of exterior exclusion, targeted trapping, and resource reduction—not from traps alone.
Resources worth bookmarking
- Seasonal maintenance checklist: Re-check seals each fall (when rodents seek warmth) and each spring (after weather expansion/contraction).
- Local waste and compost rules: Municipal guidance can influence which bins and lids reduce pests.
- Homeowner reporting: Large outlets sometimes cover citywide rat and pest pressures and prevention tactics; for broader context, you can browse reporting at The New York Times.
Conclusion: build a “no access, no resources” system
Modern rodent proofing is less about a single miracle product and more about stacking small, high-confidence upgrades: seal the 1/4-inch gaps, harden vents and doors, eliminate water sources, and remove easy food and nesting opportunities. Start with the exterior audit and door/vent fixes—then move inward to moisture control and storage. When you approach rodent prevention as a system, you get fewer surprises, less damage, and a home that stays protected year-round.